
DIY Craft Room Makeover On A Budget!
After years of working in a small, somewhat cramped craft room, I finally had the opportunity to do the craft room makeover of my dreams!
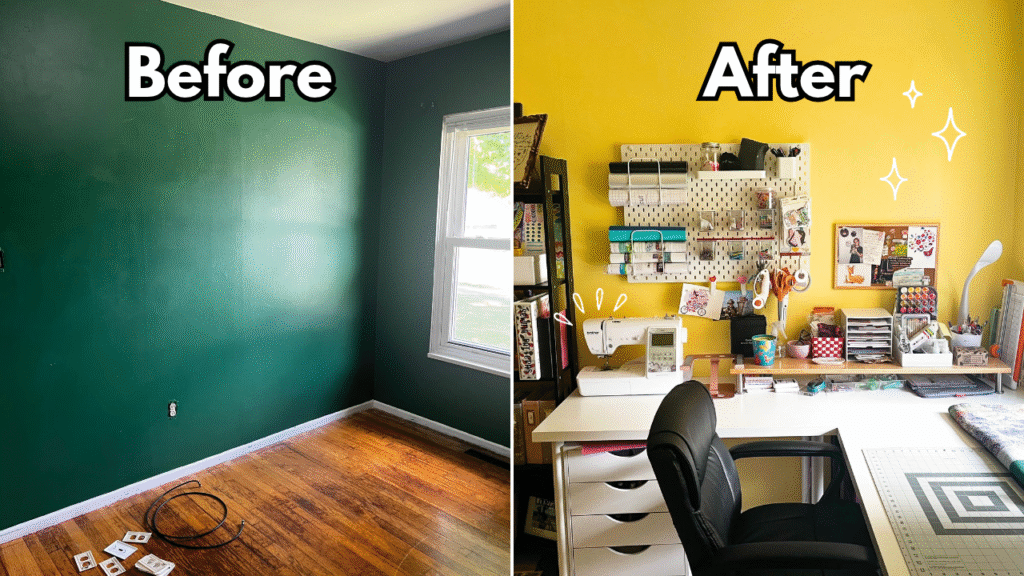
I wanted somewhere that felt bright, cozy, and inspiring, but most importantly, a space where I could comfortably store all of my scrapbook supplies, crafting tools, and machines without feeling like everything was crammed together.
This room started out with dark green walls, unfinished trim, and not much personality. But with a little paint, some rearranging, and plenty of organizing, it eventually became a space that I absolutely love spending time in.
If you’re planning a craft room makeover of your own, I’m sharing some of the things I did to transform the space, along with a few storage ideas and tips that made the moving and organizing process much easier.
Watch the full craft room makeover below!
Items mentioned:
- Desks are from ikea!
- Floral rug: https://link.amazon/B09sc3PWx
- Storage cubes: https://link.amazon/B0btDxDGe
- Desktop paper storage: https://shareasale.com/r.cfm?b=33086&…
1. Brightening Up the Room With a Fresh Coat of Paint
The first thing I wanted to change was the overall look and feel of the room. It originally had dark green walls, which made the space feel much smaller and darker than it actually was.
I knew I wanted something light and cheerful, so I decided on a soft butter yellow. The color I chose was Polka Dot Skirt by Behr, and I absolutely love how it turned out!
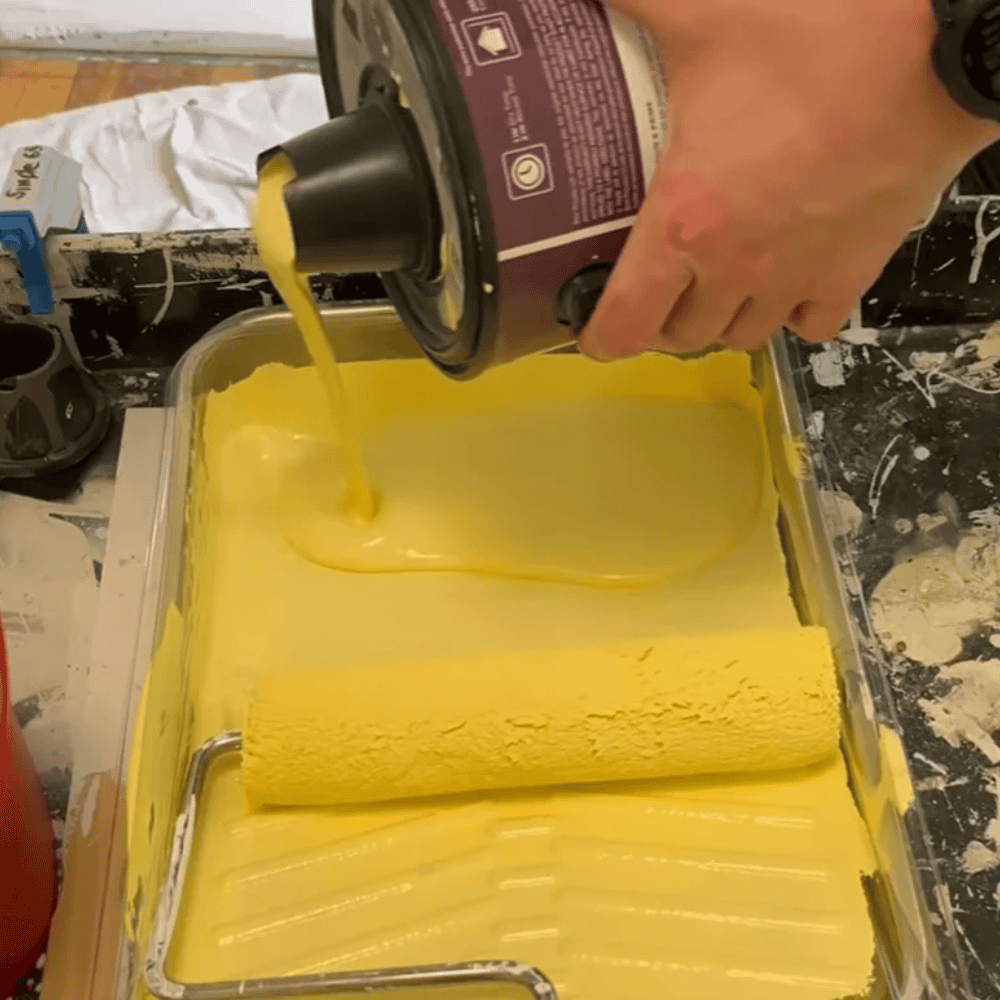
Because the original green was so dark, we had to apply two coats of primer before painting. It was definitely a little more work than I anticipated, but the difference was incredible. The yellow makes the entire room feel brighter, especially when natural sunlight comes through the window.
If you’re considering adding some color to your own craft room, I highly recommend considering a soft yellow. It’s cheerful without being overwhelming and makes such a pretty backdrop for all of your colorful craft supplies!
2. Moving and Packing Up Years of Craft Supplies
One of the biggest challenges of this makeover was moving everything from my old craft room into the new space.
I’ve accumulated quite a collection of scrapbook paper, stickers, embellishments, tools, and machines over the years, so packing everything up was quite the project!
My biggest tip if you’re moving your craft room is to keep as many supplies in their original storage containers and organizers as possible.
For example, rather than removing everything from my drawers and packing each item separately, I left my supplies organized inside the drawers whenever possible. This saved so much time when it came to unpacking and setting everything up again.
I also found that moving everything gave me a chance to rediscover supplies I hadn’t used in years. There were paper collections tucked away in storage that I had completely forgotten about!
Sometimes a little rearranging is all you need to find inspiration in things you already own.
3. Arranging Furniture and Creating a Functional Workspace
Before unpacking all of my smaller supplies, I wanted to get the larger furniture and storage pieces into place first. This gave me a better idea of how much space I had available and where everything would go.
One thing I knew from the beginning was that I wanted my desk positioned directly in front of the window. Having natural sunlight while I’m crafting makes such a difference, and I love being able to look outside while working on projects.
From there, I arranged the rest of my furniture based on how frequently I use certain supplies. I wanted my most-used tools and materials to be easy to reach without having to constantly get up or dig through storage.
A lot of my furniture and storage pieces are from IKEA and Amazon. I’ve found that IKEA has some really great options for craft room organization, especially when you’re trying to maximize storage without spending a fortune.
4. Organizing My Scrapbook Paper Collection
One of my favorite things to organize is my scrapbook paper! Over the years, I’ve collected so many different paper collections, and keeping everything organized makes it much easier to find exactly what I need when starting a new project.
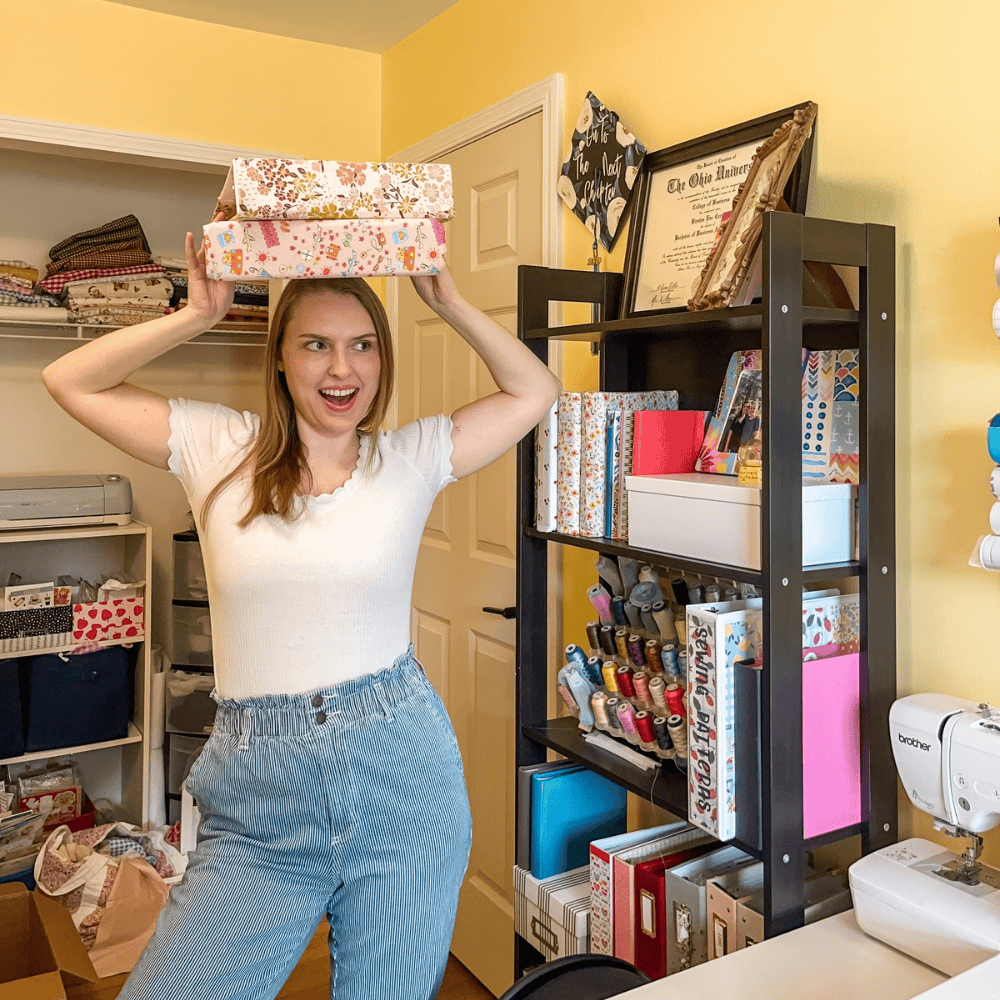
For this move, I organized much of my paper by theme and season. This makes it easier to find specific collections when I’m working on holiday layouts, travel albums, or other themed projects.
I also use a large paper organizer that holds quite a bit of my collection. Scrapbook paper can take up a surprising amount of space, especially when you start collecting different sizes and coordinating paper packs.
If you’re looking for more ideas for storing your paper, I have other posts and videos dedicated to scrapbook paper organization!
5. Displaying Scrapbook Albums and Sentimental Keepsakes
One of my favorite parts of setting up my new craft room was finally having room to display some of my completed scrapbook albums and sentimental keepsakes.
I have a bookshelf where I place all of the mini albums that I’ve made over the years.
I think displaying your completed projects is such a fun way to decorate a craft room. Not only do they add personality to the space, but they also serve as a reminder of all the memories you’ve documented and the things you’ve created over the years.
6. Making Use of Wall Space With a Pegboard
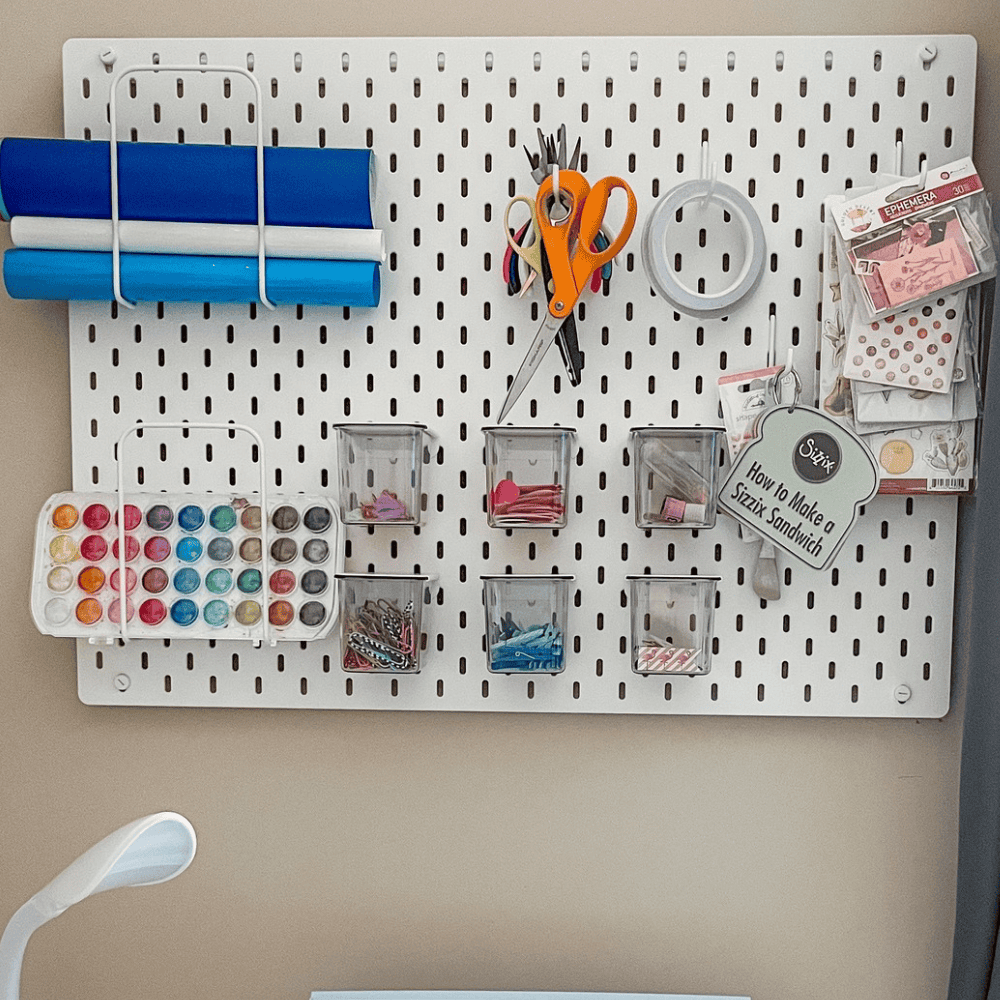
Another addition to my craft room was an IKEA pegboard. I love these because they’re so versatile. They also give you an easy way to organize supplies without taking up additional desk or shelf space.
I added mine above my workspace so I could keep some of my frequently used supplies within reach. You can customize pegboards with different hooks, containers, and accessories. Making them useful for all kinds of crafting tools.
If you’re working with a smaller craft room, I highly recommend taking advantage of your vertical wall space. Adding shelves, pegboards, and wall organizers can make a huge difference when you’re trying to fit a lot of supplies into one room.
Plus, I love that you can decorate them and make them part of the overall look of your space!
7. Adding Cozy Decor and Personal Touches
Once most of the organizing was finished, I wanted to add a few final touches to make the room feel a little more cozy and inviting.
The first thing I added was a 5×7 rug from HomeGoods. I originally considered a few different gray options, but eventually found one that had some yellow in it to coordinate with the walls.
Adding a rug really helped bring everything together and made the room feel warmer and more finished.
I also hung two of my own paintings on the wall. I love incorporating my own artwork into the space because it makes the room feel more personal and unique.
The Finished Craft Room Makeover!
It’s amazing how much a room can change with a little bit of work. What started as a dark, unfinished space is now a bright and cozy craft room that gives me so much more room to create.
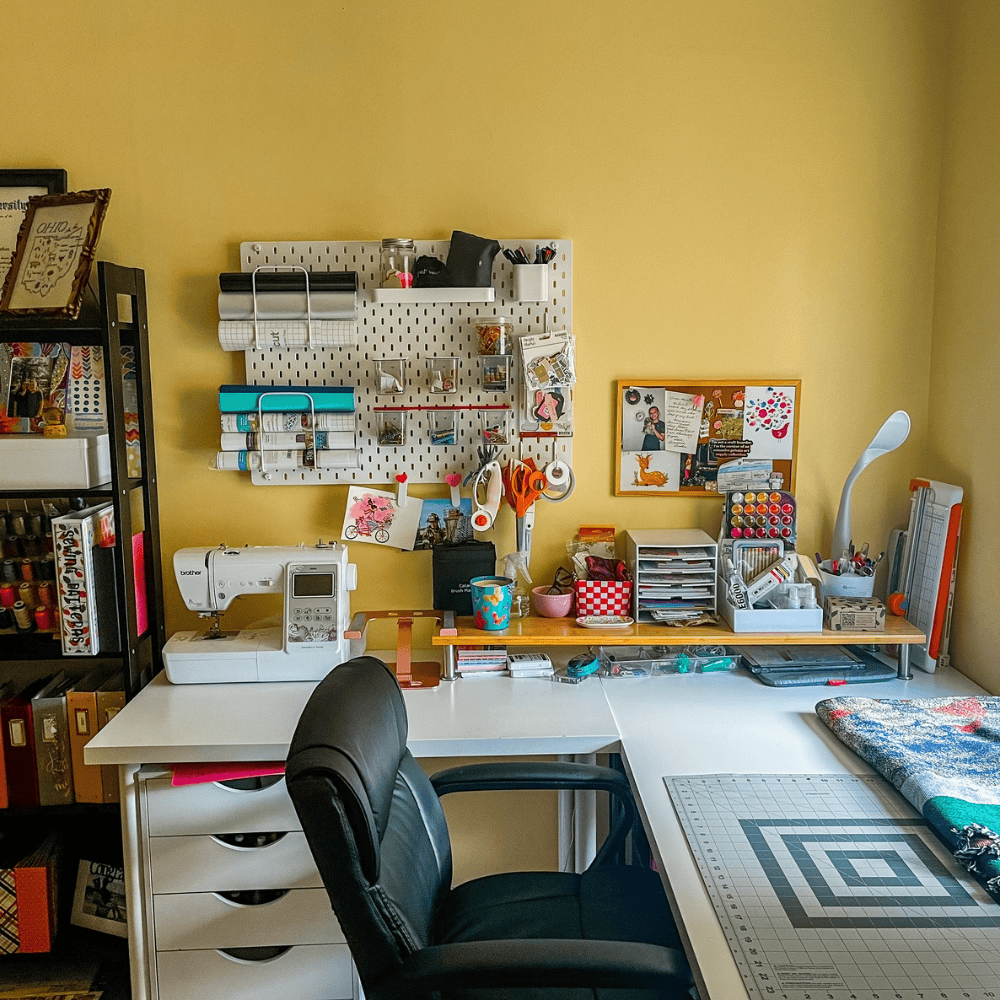
My favorite thing about this makeover is that I didn’t have to purchase an entirely new set of furniture or storage. I was able to reuse so many of the pieces from my previous craft room and simply rearrange them to work better in the new space.
Having everything organized and within reach makes such a difference, and I’m especially happy to finally have a dedicated workspace for all of my scrapbooking and embroidery projects.
If you’re thinking about upgrading your own craft room, I hope this makeover gave you a few ideas or inspired you to make the most of the space you already have. You don’t necessarily need to spend a lot of money to create a workspace you love!
What’s your favorite part of a craft room? Is it the scrapbook paper storage, your desk setup, or all of the little decorative touches? I’d love to hear about it in the comments!
This post shares my budget-friendly craft room makeover to inspire others!
Please Note: Some of the links above are affiliate links. Read the full disclaimer here.


