Best Way To Use The Shotbox For Scrapbook Photography
The Shotbox by We R Memory Keepers is definitely my favorite way to take pictures of my finished scrapbook layouts. In this post I will be sharing how I use this magical machine to take photographs of my layouts for social media.
Picture this: you have been working on your scrapbook page for hours and finally got it to look perfect. You are so proud of your work that you want to share it on Instagram/ Facebook for all your scrappy friends to see. Except, when you go to take a picture the colors are not as vibrant and there is an annoying glare on the photographs.
After trying different methods for taking pictures of my layouts I finally came across the We R Memory Keepers Shotbox machine. It is the perfect solution for solving all those pesky problems mentioned above. It is by far the most user friendly machine for those of us who do not know how to work photoshop. Follow along as I take you on how I use the machine for photographing scrapbook layouts.
Shotbox We R Memory Keepers
Shotbox Review
When I first got the machine in 2020 I made a review all about my first impressions. Watch the video to get a better understanding on just how easy it is to setup and just how many things you can take a picture of. Also see some of the things I disliked, such as the price. It has been over a year since I did this review and for the most part my opinions still stand. However, after using it almost every day I have learned even more tricks on taking a best pictures of scrapbook pages.
After watching my review video you can see firsthand just how much better the after pictures are with the special lighting. While I still like to edit my photos after, it is absolutely not necessary. I love how it helps to reduce glare on the photographs while making consistent lighting throughout. Recently, I’ve been loving all the fun backgrounds that are available.
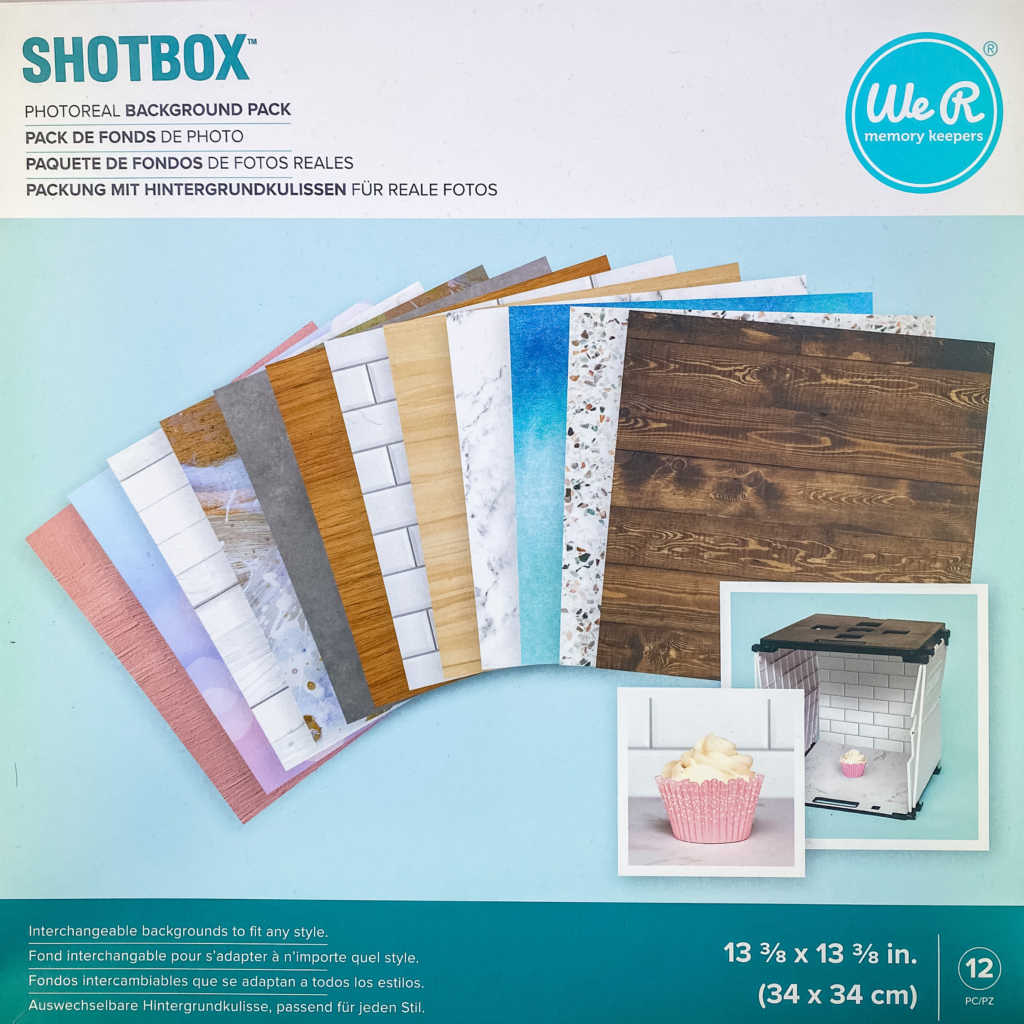
Shotbox Backgrounds Bundle
If you are interested in purchasing the We R Memory Keepers photo studio kit you have many options. You can purchase the shot box Amazon, at Michaels craft stores, and Joann’s. There are also many tools you can try out alongside the machine to improve your scrapbook photography.
The bundle comes with everything you need and more to get you started. It includes the machine itself along with different colorful backgrounds, the arm attachment as well as a quality carrying case for storage. The Shotbox backgrounds are great for brightening up your photos. Personally, I love the white wood background when I take my pictures of scrapbook pages. Other backgrounds include white wall tile, marble, pink & blue, speckled and concrete. The arm attachment is great for taking front-facing pictures by allowing a sturdy hand.
Setting Up The Backdrops
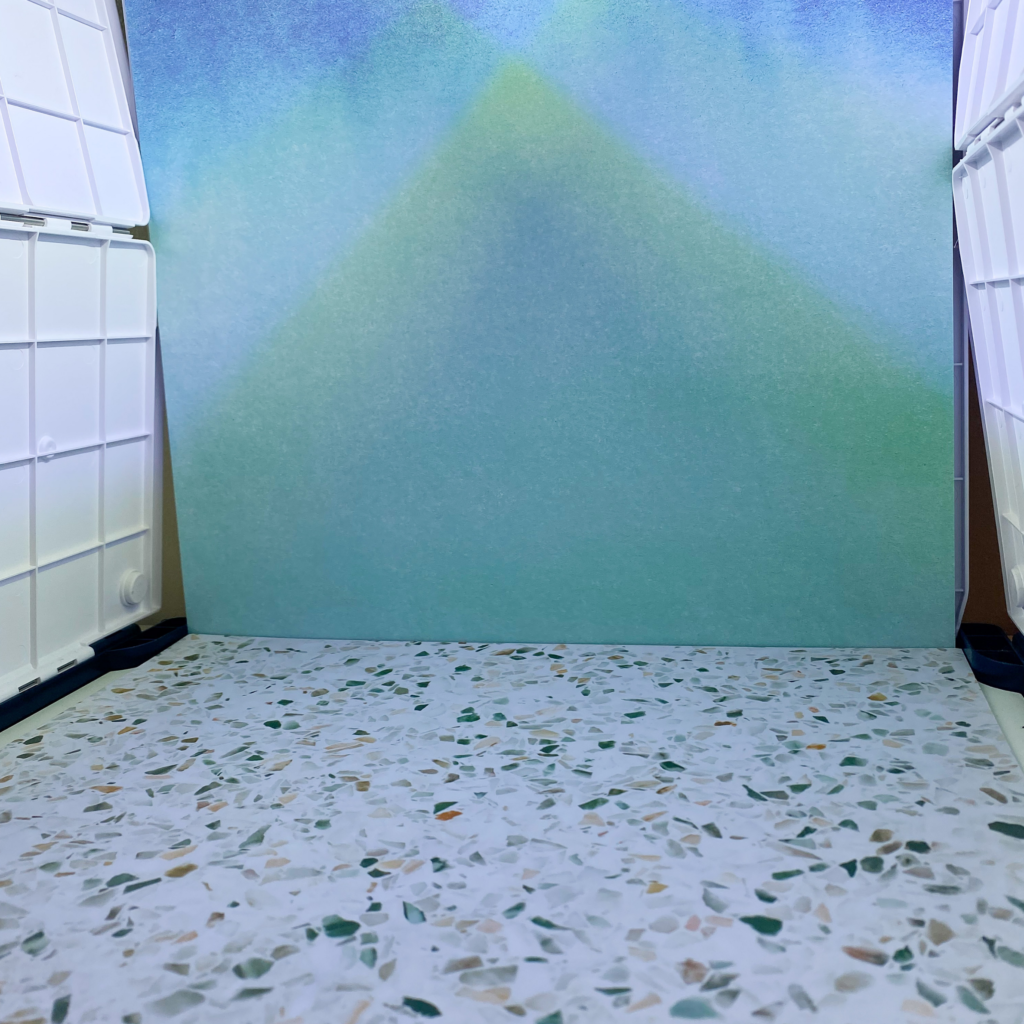
Setup is extremely easy and only takes a few seconds. Before I take my scrapbook photography I first choose the background. Lately, I have been using the white wood background for my layouts because it gives the photo a simple and clean look. Next, I always put the glare shields on the lights. These are magnetic pieces that come with the machine and easily snap to the inside. The shields help to remove any glare on the pictures.
One of the many advantages is the different brightness settings. You can decide how bright you want the lights to shine based on what you are photographing. It is best to play around with the settings until to find the level of brightness that looks best. When taking the photos I only use my Iphone. It is not necessary to buy a fancy camera.
A special tip I learned when using the machine is to not zoom in when taking your photos. When you zoom in there is a possibility of losing some of the quality. Instead, after you take the photo simply just crop the image. Since you will see the sides of the machine when taking the photo this step is essential.
{Related Post: “THE ULTIMATE SCRAPBOOK SUPPLIES LIST FOR NEW CRAFTERS”}
Scrapbook Photography
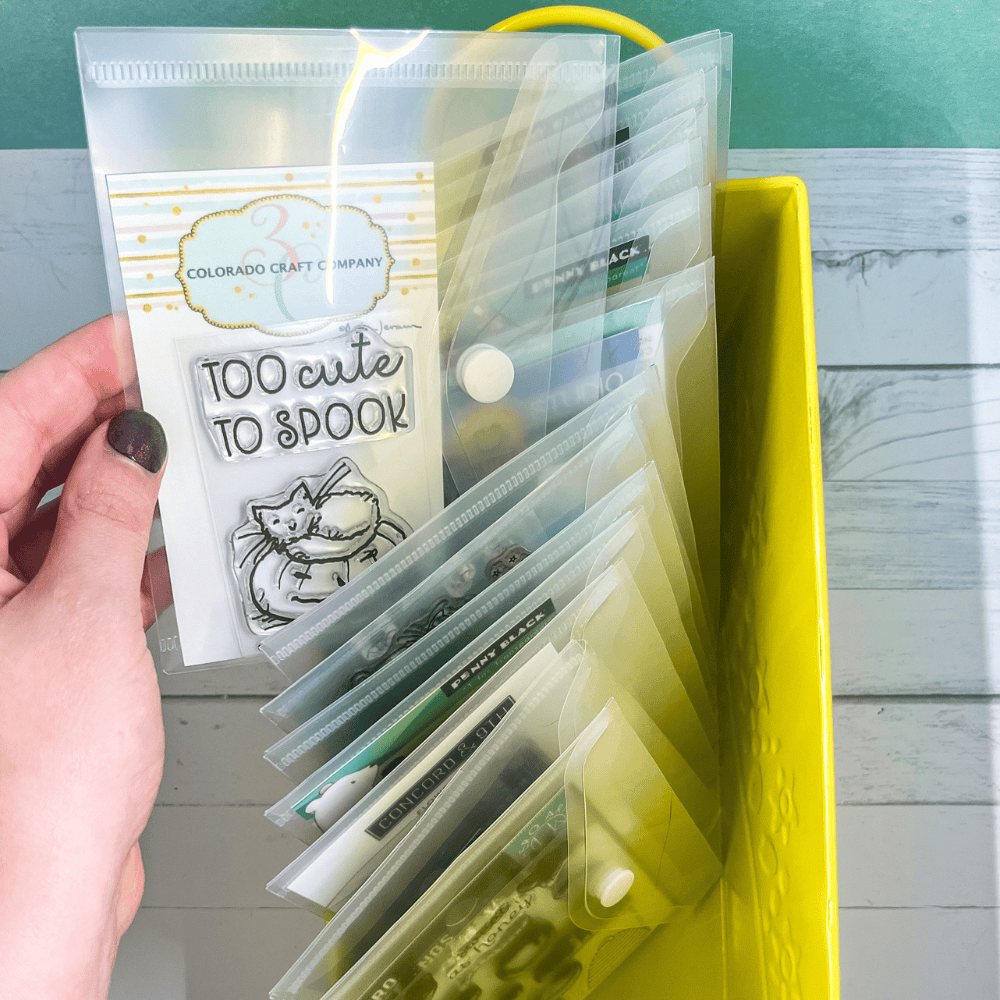
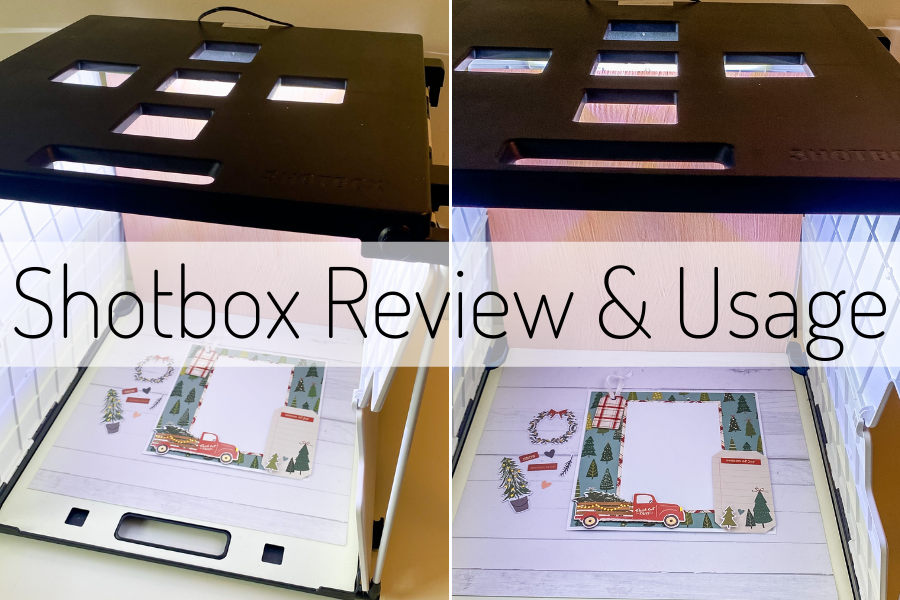
The box is the perfect size for any 12 by 12 inch scrapbook layouts. It also works well with many mini albums and paper crafts DIY. Below I will be sharing some before and after pictures I took of my scrapbook layouts. Swipe to see the difference in colors side by side.
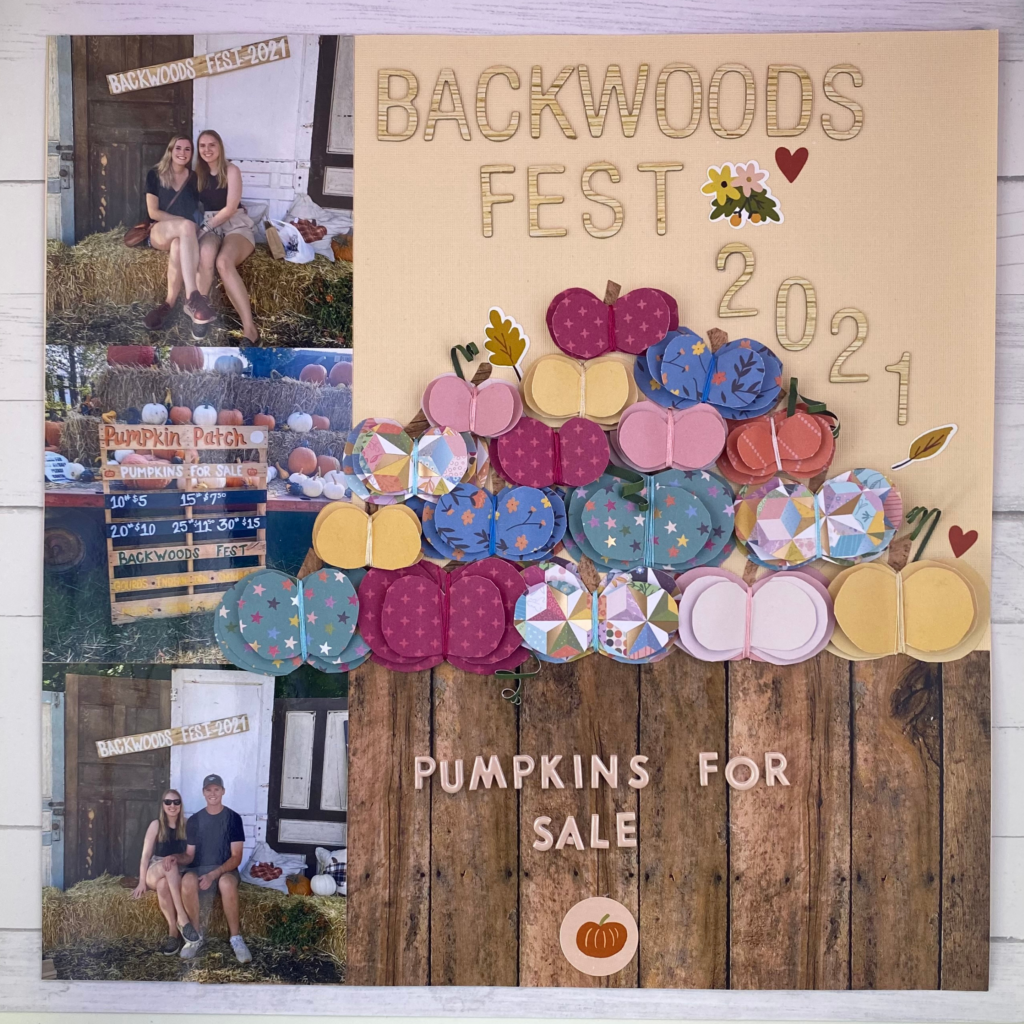
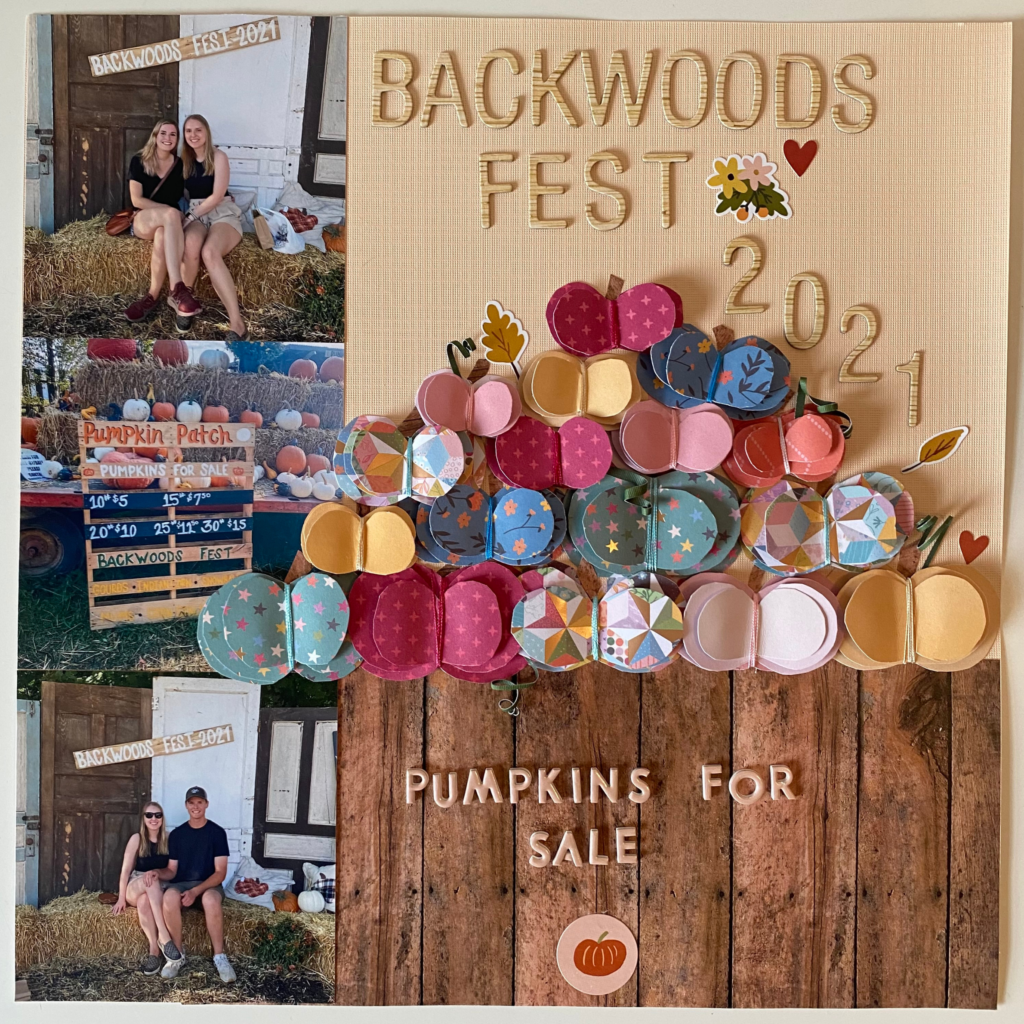
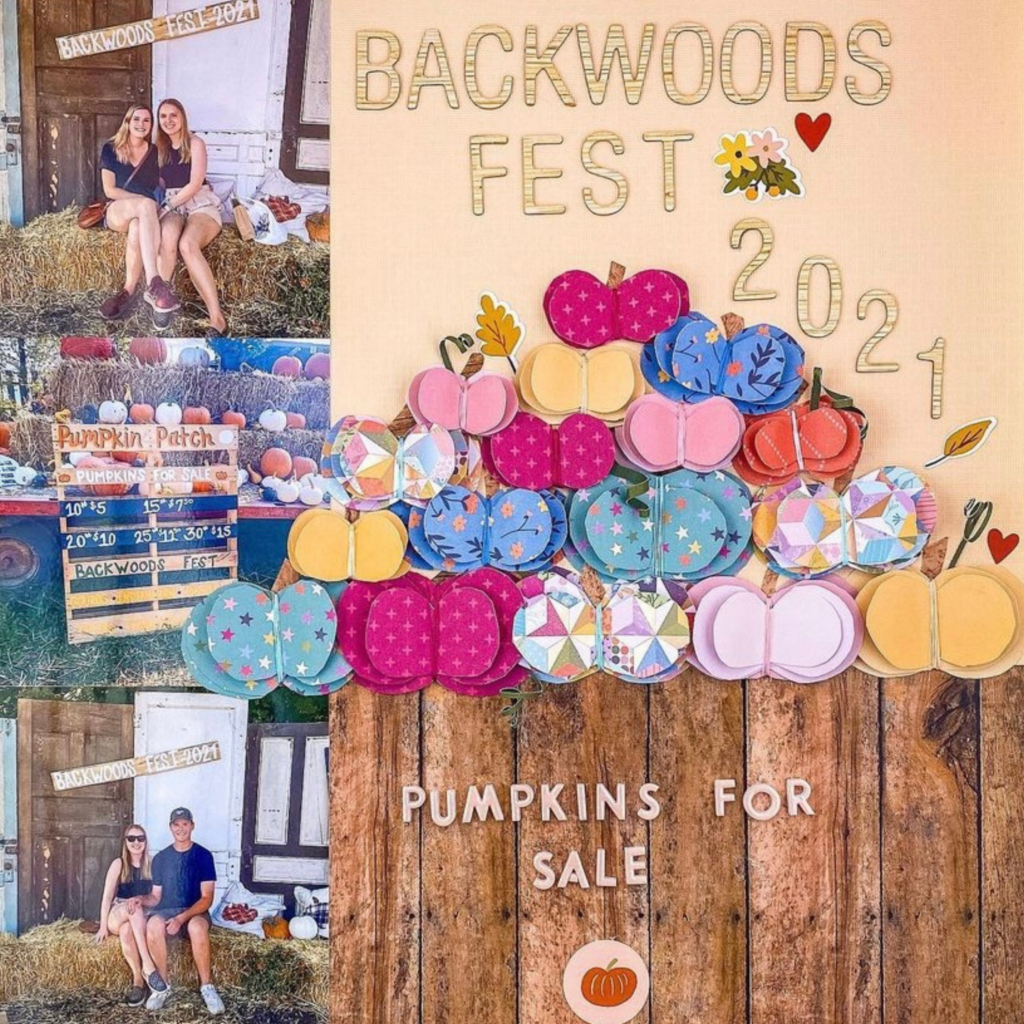
In this first photo I was capturing a 12 x 12 scrapbook layout. The before picture was taken in front of a window with some natural lighting. You can see there are a lot of shadows which I do not like. Now looking at the after picture using the shot box you can see the shadows are gone. However, getting rid of the shadows did lighten everything up. Therefore when I edited the after photo I bumped up the saturation to get the vibrancy back. I absolutely love how the final after photo looks and is the one I will be using to share on my social media pages.

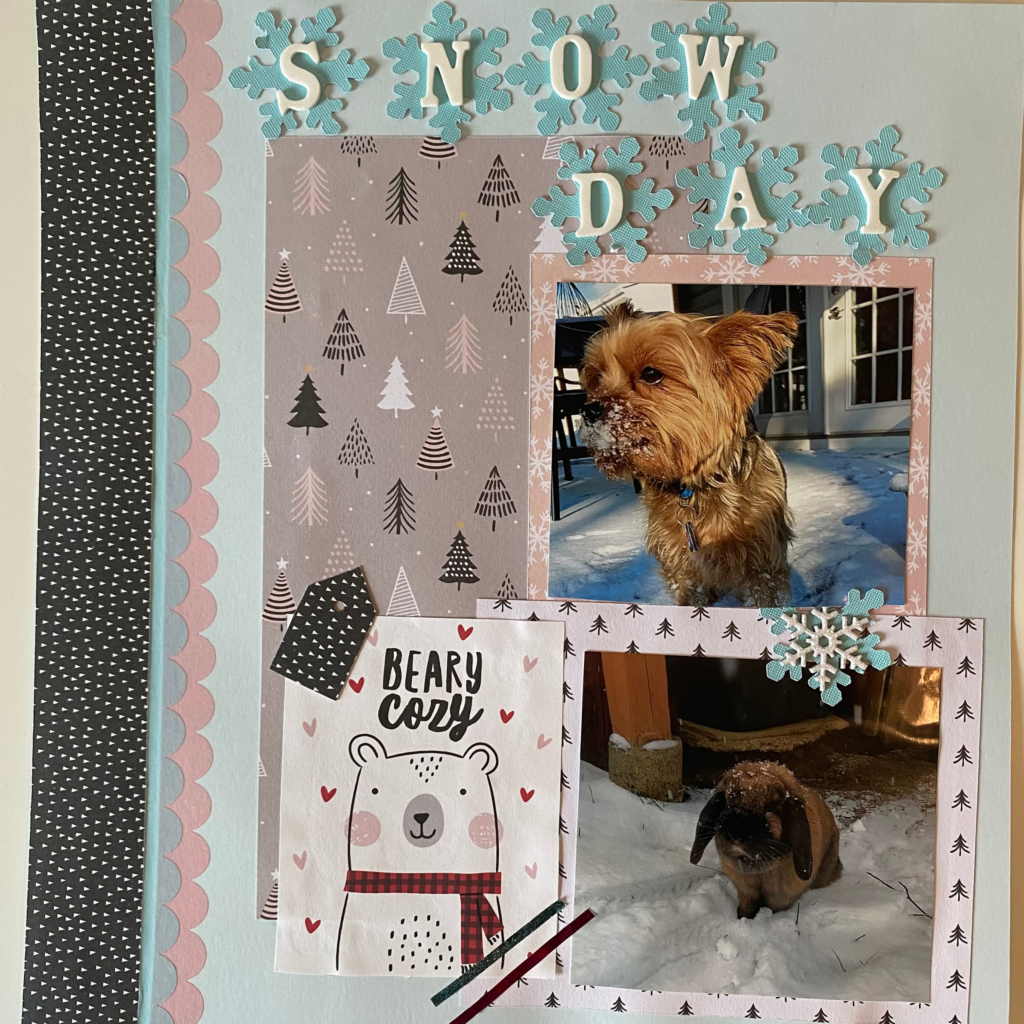
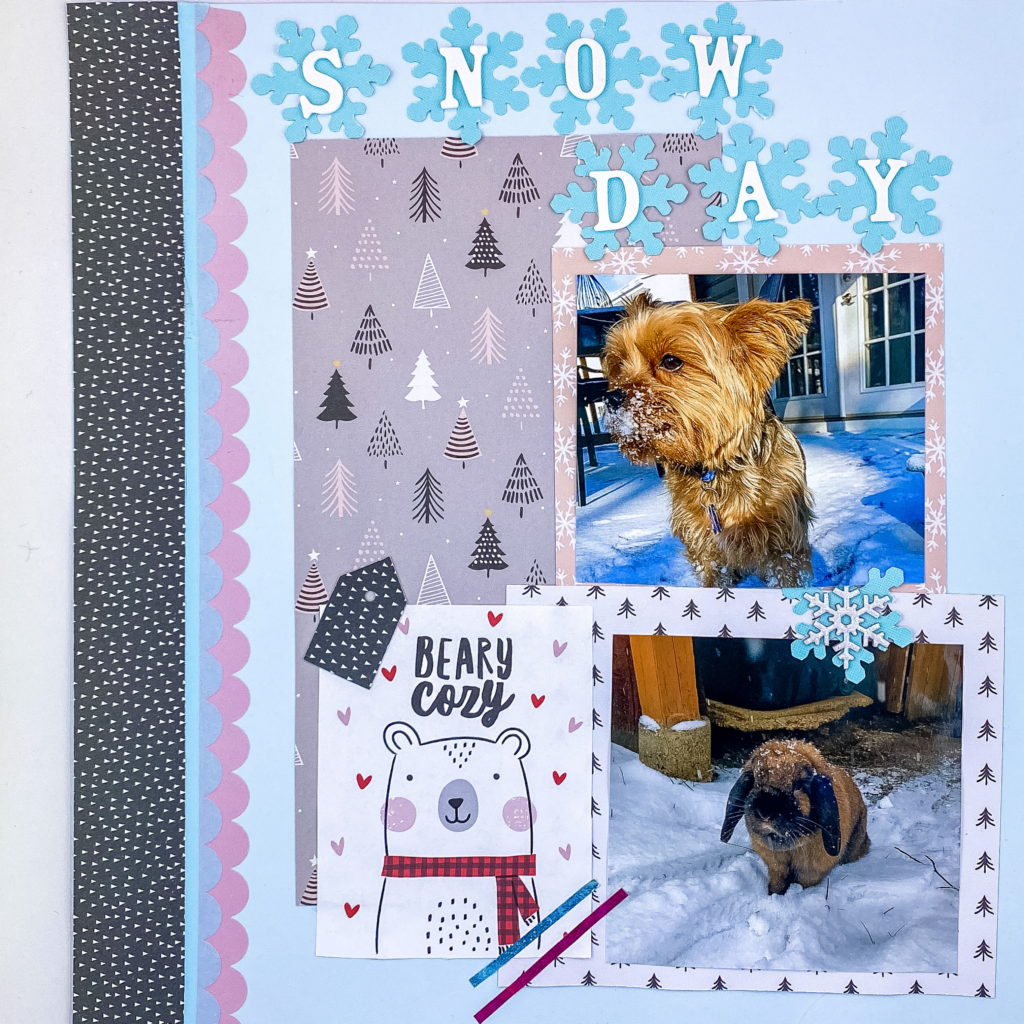
Here is a second example using a different page layout. You can see the before picture is way darker and even has a yellow tint to it. All the colors do not show up as they look in real life, making the layout look dull and dark. I prefer my photos white and vibrant which I can easily achieve after using the lights. Again I edited the photo after and got the perfect end result. If you are interested in how I edit my photos exactly, read until the end where I explain more in depth.
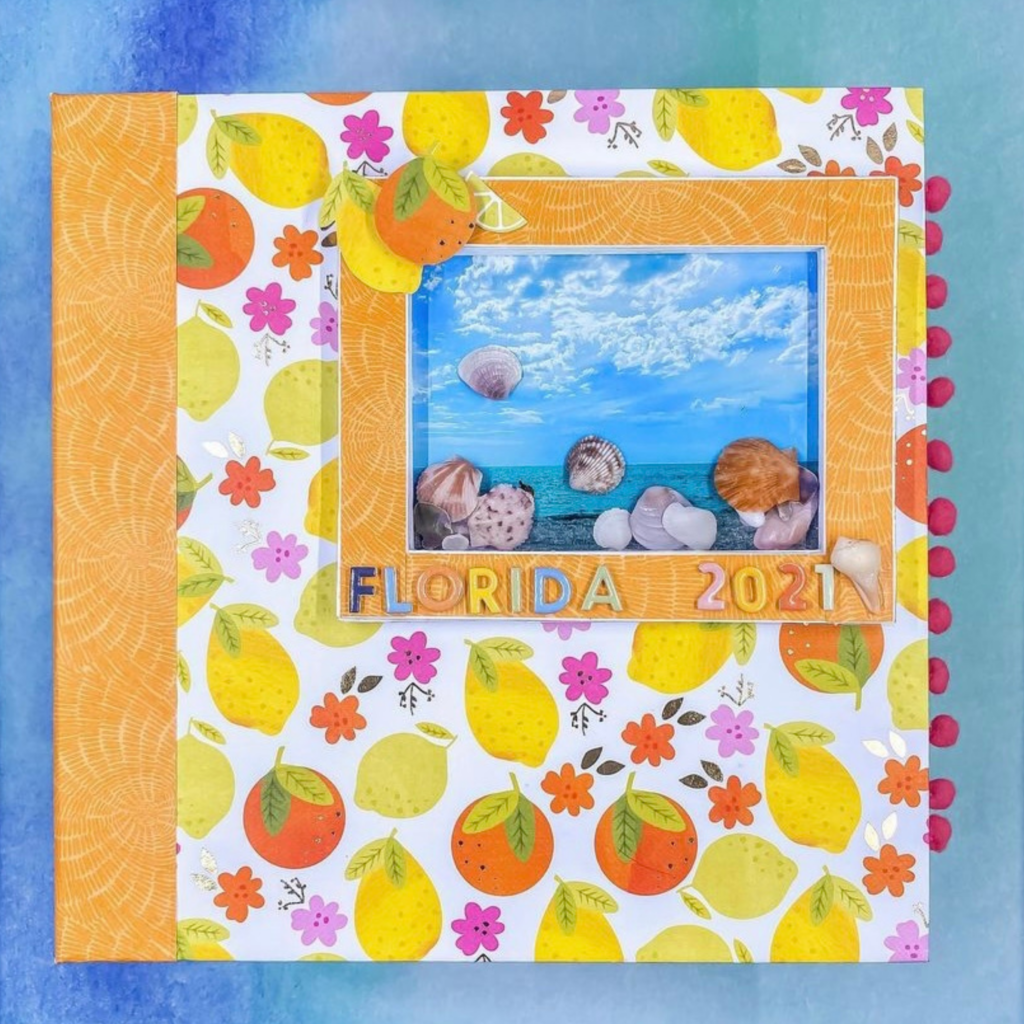
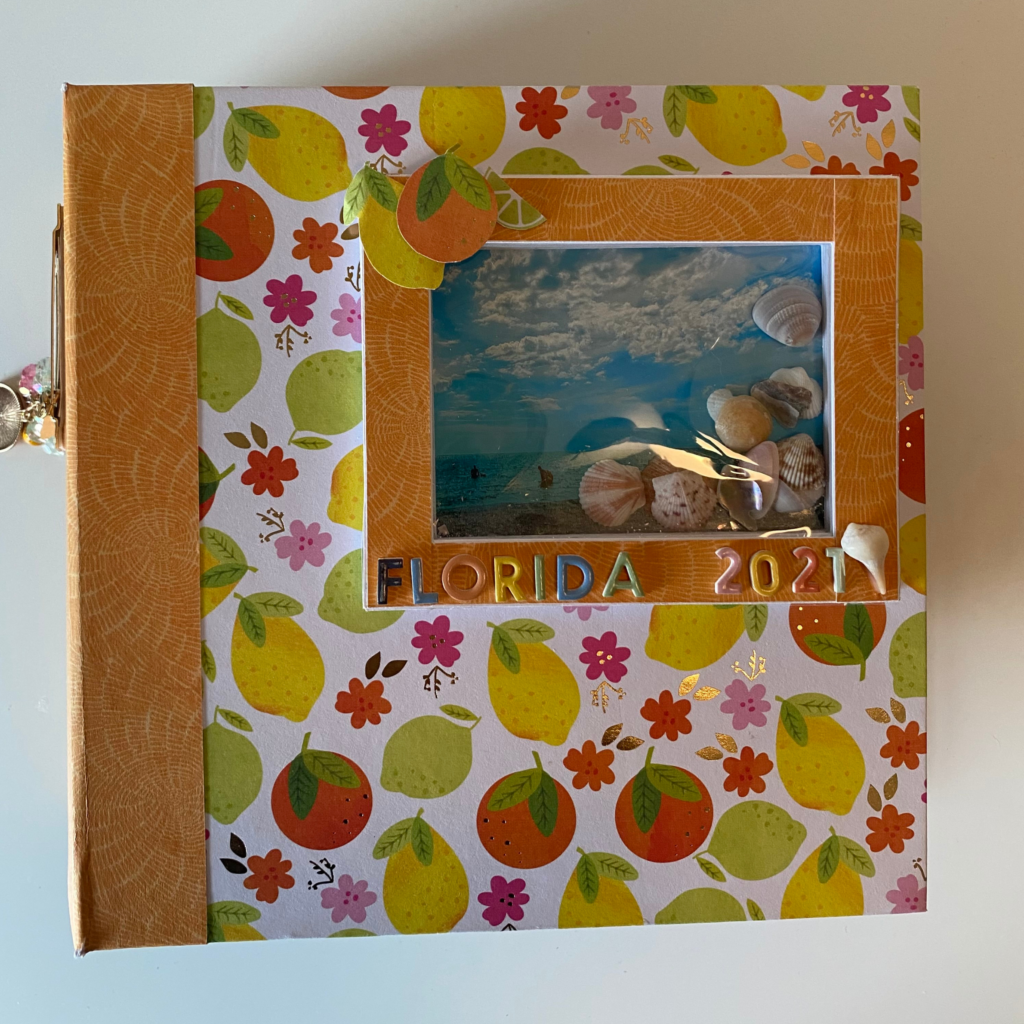
This is the perfect way to take photos and videos of your mini albums. If you are doing a flip through of one of your albums you can easily set the phone on top so you do not have to hold it while you are flipping pages. Here you can also see the fun backgrounds that are available. I love the bright blue for a beachy theme. As you can see in the before picture it was extremely difficult to get the glare out of the plastic. After using the two glare shields that are included with the machine it takes a clear and detailed image without any reflections.
Editing And Finalizing The Photos
While the lighting does an excellent job on it’s own, I do take an extra step in editing the photos after. Editing the final photo helps brighten it up even more and allows all my pictures to stay consistent on my blog/ Instagram. You do not need a special software like photoshop to edit your photos. I recommend sticking with the basic Instagram edit features or the Lightroom app. Personally, I use the Lightroom app because it offers a bit more options.
In order to get bright, clear photos of my scrapbooking pages I only adjust a few things. First, I will turn up the exposure to lighten everything up. There is no absolute setting I keep it at. Instead I often just play around with the adjustments until I get the desired look. Next, I will oftentimes turn up the saturation and vibrancy. I enjoy using colorful paper and stickers on my layouts which can get washed out in the picture taking process. By increasing the saturation the colors look much more vibrant and lively. I make sure the colors look just how they do in real life and do not get overly saturated. Finally, I adjust the detail to get rid of any minor blurriness and get a clear photo. These three things can make a huge improvement and only take a few seconds.